Using Ultrasonic Cleaners to Remove 3D Printed Mold Supports
3D printing, encompassing technologies like fused deposition modeling (FDM) and fused filament fabrication (FFF), has revolutionized manufacturing by significantly reducing the cost and complexity of traditional molding techniques, such as lost wax casting. By utilizing compatible thermoplastic materials like ABS for the part and PLA for removable mold supports, 3D printing enables the rapid creation of intricate and complex designs. A critical step in this process is the efficient and safe removal of PLA mold supports without damaging the delicate ABS part. Ultrasonic cleaners have emerged as a superior method, offering faster, safer, and more effective results to remove mold supports compared to traditional techniques like water spraying or manual scrubbing.
Understanding 3D Printing and Mold Supports

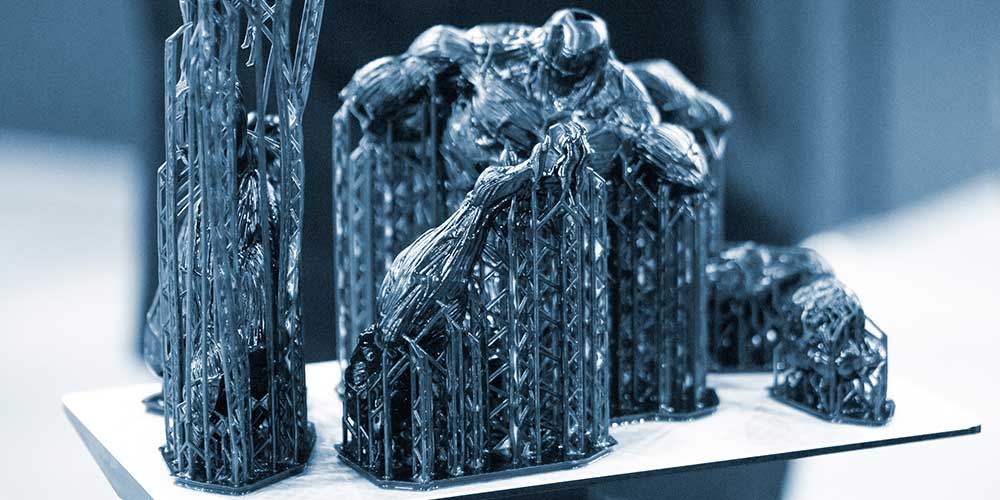
In 3D printing, computer-aided design (CAD) files are translated into instructions for the 3D printer. The printer then uses thermoplastic filaments to build components layer by layer. In FDM, ABS filament typically forms the final product, while PLA filament serves as a sacrificial support structure, providing stability for overhangs, filling voids, and supporting intricate features. Once the printing process is complete, the mold support must be removed to reveal the finished part.
The Power of Ultrasonic Cavitation to Remove Mold Supports
Ultrasonic cleaners leverages the power of cavitation to remove mold supports effectively. Cavitation involves the formation and implosion of millions of microscopic bubbles in a cleaning solution, generated by transducers vibrating at ultrasonic frequencies. These implosions create localized pressure waves that dislodge contaminants, including mold support materials, from the surface of the part.
How to Remove FDM Mold Supports with an Ultrasonic Cleaner
- Material Compatibility:
- Ensure the part material (e.g., ABS) is compatible with the cleaning solution and ultrasonic process.
- Confirm that the support material (e.g., PLA) is susceptible to ultrasonic cavitation and the chosen cleaning solution.
- Cleaning Solution Selection:
- The cleaning solution chemistry is crucial for effective mold support removal without damaging the part.
- For PLA supports, a highly alkaline or caustic solution with a wetting agent is often recommended.
- Consult with Tovatech’s experts to determine the optimal cleaning solution for your specific materials.
- Other support materials like water-soluble waxes may require different cleaning solutions.
- Preparing the Ultrasonic Cleaner:
- Fill the ultrasonic cleaner tank with water to the fill line.
- Add the correct amount of cleaning solution concentrate according to the manufacturer’s instructions.
- Activate the degas mode to thoroughly mix the solution and remove trapped air. This step is essential for optimal cavitation.
- Setting Operating Parameters:
- Set the thermostat to the recommended cleaning solution temperature.
- Wear protective gloves and use tweezers to carefully place the 3D printed parts into the cleaning solution.
- Set the timer to the desired cleaning duration. Cleaning time will vary based on part complexity and the amount of support material.
- Place the lid on the tank to minimize evaporation and noise.
- Ultrasonic Cleaning Process:
- Activate the ultrasonic cleaner.
- The cavitation process will begin, effectively removing the mold support material.
- Inspection and Rinsing:
- After the cleaning cycle, carefully remove the parts using tweezers or gloved hands.
- Inspect the parts for complete mold support removal.
- Thoroughly rinse the parts with clean water to remove any residual cleaning solution.
- Solution Maintenance:
- Replace the cleaning solution when its effectiveness diminishes.
- Drain and dispose of the used solution according to local regulations.
- Clean the tank according to the user manual before refilling with fresh solution.
Benefits of Ultrasonic Cleaning for 3D Printed Parts
- Precise Cleaning: Cavitation reaches intricate areas and removes support material from complex geometries.
- Reduced Damage: Gentle yet effective cleaning minimizes the risk of damage to delicate parts.
- Faster Processing: Ultrasonic cleaning significantly reduces cleaning time compared to manual methods.
- Consistent Results: Provides consistent and repeatable cleaning results.
Expert Assistance and Support
Call or chat with Tovatech’s ultrasonic cleaner experts for assistance in selecting the right equipment and cleaning chemistry for your 3D printing applications.
