
The American Dental Association releases guideline updates on how dental technicians can protect themselves during the current Corona Virus pandemic. It also refers dentists to conform to CDC guidelines for sterilizing and disinfecting patient care items and devices.
These guidelines refer to reusable dental instruments, and among other techniques recommend the use of ultrasonic cleaners as a pre-sterilization or disinfecting procedure to render them safely for reuse.
Ultrasonic Cleaners In CDC Recommendations for Covid-19 Infection Control
The CDC's 2008 Infection and Sterilization Guideline notes that "The most common types of mechanical or automatic cleaners are ultrasonic cleaners…" and that "Ultrasonic cleaning removes soil by cavitation and implosion in which waves of acoustic energy are propagated in aqueous solutions to disrupt the bonds that hold particulate matter to surfaces."
Note that ultrasonic cleaning is a pre-sterilization or disinfecting procedure for reusable dental instruments. This post explains how dental technicians can help protect themselves during the Covid-19 pandemic - as they have in the past - by using an ultrasonic cleaner in their practice.
How a Dental Ultrasonic Cleaner Works
Ultrasonic energy creates billions of minute vacuum bubbles in an ultrasonic cleaning bath that implode with tremendous force when they contact dental instruments.
The bubbles are created by generator-powered transducers bonded to the bottom of the cleaning tank. When activated they vibrate at ultrasonic frequencies such as 37,000 cycles per second (37 kHz). It is this vibration on the tank bottom that creates the vacuum bubbles.
The process, called cavitation, reaches into tiny cracks and crevices, literally blasting contaminants away from dental instrument surfaces in a much more efficient manner than manual scrubbing, which has the additional disadvantage of requiring dental technicians to handle sharp instruments.
Only after a thorough ultrasonic cleaning should dental instruments move to the second and third stage: disinfecting or sterilization then packaging. That is because residue will interfere with microbial inactivation and can compromise subsequent processes, according to the CDC.
How to Operate an Ultrasonic Dental Cleaner
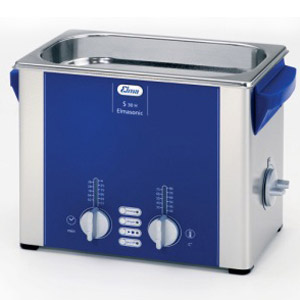
Bench or table-top dental ultrasonic cleaners are available in several sizes. An example is the 1.5 gallon Elmasonic EP60H available from Tovatech. It can be used to clean instruments such as picks, drills, mold spoons; prostheses such as dentures and crowns, and to remove cement and plaster.
Here are Suggested Procedures
- Until instruments are ready to be cleaned keep them immersed in either a germicidal or enzymatic presoak such as PreZyme. Do not let instruments dry out before ultrasonic cleaning.
- Use an ultrasonic cleaning solution formulated for cleaning dental instruments. While one might think a disinfectant solution is ideal for such applications in fact a disinfectant can make contaminants such as proteins harder to remove.
- Instead employ a detergent or enzyme solution for these applications such as MedClean C7. Ultrasonic Cleaning Solution diluted to 1 to 3 ounces per gallon of water or per instructions on the container.
- Objects to be cleaned are placed in a mesh tray or basket that is suspended by its handles into the ultrasonic cleaning solution so that the instruments are fully immersed*.
- Cleaning time (typically 7 to 10 minutes depending on the size of the load) and the temperature are set using the intuitive control panel and the unit turned on. Note that solution temperatures should be kept below 42°C (107⁰F). Otherwise particles could “bake” on the instruments and cannot be removed by sterilization.
- When the ultrasonic cleaning cycle is completed, rinse the instruments in water to remove solution residue and then move to the disinfecting or sterilizing steps to complete the process. As an interim step Barrier Milk can be used to lubricate hinges and prevent corrosion.
The ultrasonic cleaning solution should be changed at least once a day and the tank thoroughly cleaned and allowed to dry before being refilled with fresh solution.
Follow the Instructions provided by manufacturers of ultrasonic cleaning equipment and solutions. A side-mounted knob on the EP60H is turned to drain used cleaning solution via a valve on the back of the unit.
Tip on Selecting an Ultrasonic Dental Instrument Cleaner for Your Practice
Several points must be considered when you select your ultrasonic dental cleaner. Here we present a brief summary.
- Cleaning Tank Capacity. The internal dimensions of the tank are important, but more critical are the dimensions of the mesh basket that holds your instruments. Basket dimensions are slightly smaller than tank dimensions. Keep in mind that to be effectively cleaned parts must be completely immersed*.
- Ultrasonic frequency. A frequency of 37 kHz or 37,000 cycles per second is ideal for most dental instrument cleaning requirements. Multi-frequency units are used for cleaning tasks such as difficult-to-remove contaminants (lower frequencies) or cleaning equipment with highly polished or complex surfaces (higher frequencies).
- Sweep provides a slight ± variation in ultrasonic frequency to promote more uniform distribution of cleaning energy.
- Pulse provides a 20% increase in power to remove difficult-to-remove contaminants.
- Temperature Controls. As noted above a high solution temperature can cause contaminants to bake on surfaces. The process of ultrasonic cavitation heats the solution. Long cleaning cycles may call for a cooling coil to control solution temperature. In other cases the ability to heat a solution may be helpful for other cleaning tasks.
- A timer lets you set cleaning cycle duration and attend to other matters.
Further useful functions
- A degas mode removes air from fresh cleaning solutions. Air inhibits ultrasonic cavitation.
- A lid helps mute the sound of cleaning action and reduces solution evaporation. Reversible lids serve as a drip tray when baskets are removed and contents inspected.
- Tank drains are desirable on larger units when it’s time to replace cleaning solutions.
Other Dental Ultrasonic Cleaner Models
The Elmasonic EP60H mentioned above is offered in 9 tank sizes from .25 to 7.5 gallons is one of several options available for dental instrument cleaning.
Here are some others:
- 14 tank sizes from .25 to 24 gallons
- LED display shows set and actual time and temperature
- User-activated degas mode to quickly degas fresh solutions
- User-activated pulse mode to remove strongly adhering contaminants
Offers total control over the ultrasonic process
- Six tank sizes from 0.75 gal to 7.5 gal
- Variable ultrasonic power
- 4 Modes for cleaning, mixing, degassing
- Dual frequency: 37 kHz and 80 kHz
- Timer and heater up to 80° C
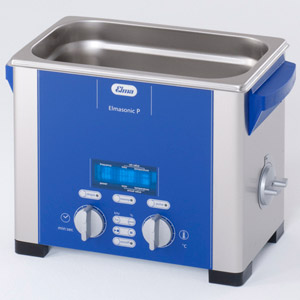
The Ultimate Option - the Elmasonic Denta pro
This is a programmed ultrasonic cleaning unit to automatically manage common cleaning challenges in dental clinics thanks to its preset programs that guarantee a standardized cleaning process for each cleaning cycle.
With the Denta pro it is no longer necessary to manually set parameters such as cleaning time, temperature, Sweep and Degas. Simply select the required cleaning program and press the "Start“ key to initiate the cleaning task.
Cleaning options include
- dentures
- drills
- molds
- plaster removal
- cement removal
- and for enzymatic and acid cleaning
In Conclusion:
Dental offices and clinics that apply ultrasonic energy to cleaning dental instruments should see increased productivity and cleaning effectiveness while reducing staff exposure to dangerous contaminants such as the Corona Virus and risk of injury due to sharp edges.
Please contact our scientists for further details and for suggestions on equipment best suited for your practice.