Cleaning Adhesive Gun and Spray Paint Nozzles with an Ultrasonic Cleaner
We sometimes get a question along the lines “Can I use an ultrasonic cleaner to clean sprayer tips?”
There’s lots of advice on the Internet for cleaning adhesive gun and spray paint nozzles. Many involve time-consuming manual cleaning and/or the use of volatile solvents such as acetone. A better way is sonic cleaning adhesive gun and spray paint nozzles using a benchtop ultrasonic cleaner. In combination with specially formulated cleaning solutions and accessories, an ultrasonic cleaner speeds the process and helps achieve fast, satisfactory results.
This post provides ideas on cleaning hot melt adhesive gun nozzles and spray paint nozzles for oil-based and water-based paints using the power of ultrasonic cavitation. It includes equipment recommendations when using flammable solvents and accessories that add efficiency to the process.
But first…..
How Sonic Energy Cleans Adhesive Gun and Spray Paint Nozzles
For those of you not fully familiar with the power of ultrasonic cleaning, please take the time to review our post on How Ultrasonic Cleaners Work.
Even if you are familiar with the process you might find useful information in answers to ultrasonic cleaning FAQs.
A Suggested Procedure for Sonic Cleaning Adhesive Gun Nozzles
Several precautions must be taken when using adhesive gun cleaning solvents in an ultrasonic cleaner, especially flammable solvents such as acetone with relatively low flash points.
The first rule is never put such solvents directly in a standard ultrasonic cleaning tank. That is because they give off vapors that can explode due to a chance spark, and otherwise be dangerous to personnel.
While there are ultrasonic cleaners especially designed for cleaning with flammable solvents, a less costly option is using special cleaning procedures in a benchtop ultrasonic cleaner employing a flammable solvent beaker kit accessory. These are available in several sizes.
In any case, when employing a flammable solvent for cleaning purposes you should follow local safety recommendations as well as those of plant safety personnel.
Ultrasonic Cleaner Preparation:
- Place the ultrasonic cleaner in an area with good ventilation and away from equipment that may cause a spark. Add water to the tank fill line along with a surfactant such as a few drops of liquid dishwasher detergent to improve the cavitation action.
- Run the cleaner in the degas mode for about 10 minutes. This removes trapped air in the liquid and improves cavitation. You are now ready for the cleaning steps.
Nozzle Cleaning Steps
- Chill the nozzles and peel away easily accessed adhesive deposits.
- Place the nozzles in beakers and add enough solvent to fully immerse them.
- Loosely cap the containers to allow vapor to escape.
- Fit the beakers into the kit’s beaker holder so that they are immersed 2-3 inches. Beakers must not be in contact with the bottom of the tank.
- Turn the cleaner on. Cavitation energy in the water solution penetrates the glass beakers and causes cavitation action in the cleaning solvent.
- Set the timer, if so equipped, for 5 minutes. Remove and inspect the nozzles. You’ll soon be able to determine a recommended cleaning time. When satisfied allow them to dry and they are ready for reuse.
Dirty solvents should be kept in a sealable container and held for proper disposal.
Spray Paint Nozzle Cleaning with an Ultrasonic Cleaner
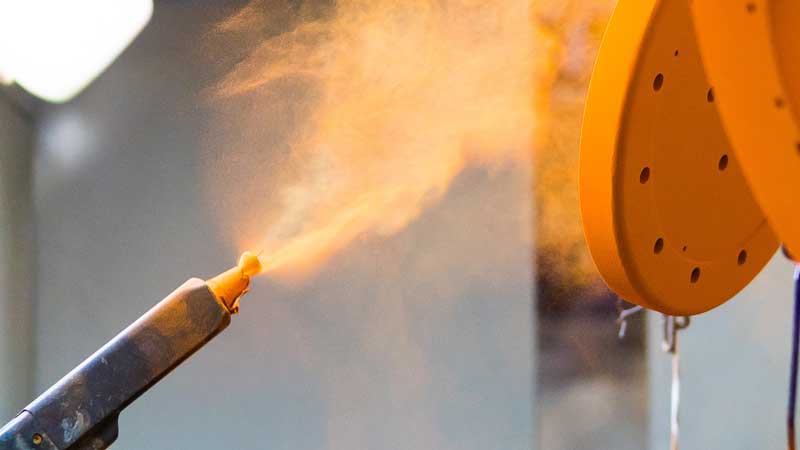
As users will attest, paint spray guns are precision tools important to providing a smooth professional finish to metal, wood and other surfaces.
To maintain peak performance paint sprayers must be cleaned on a regular basis. An ultrasonic cleaner has proven highly effective in removing paint from tip holders and painting gun components as part of an organization’s equipment maintenance procedures.
How to Clean Water-Based Paints from Spray Paint Nozzles
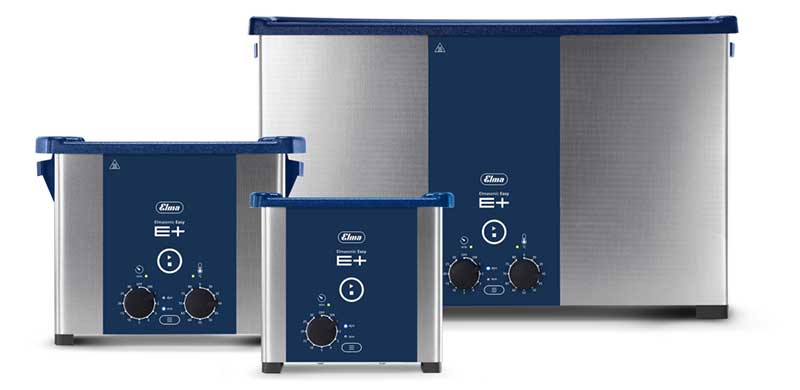
When using a water-based paints with spray paint nozzles a cleaning method is using distilled or deionized water in an Elmasonic E Plus Series cleaner available in 9 tanks sizes from 0.25 to 7.5 gallons.

Components are placed into the cleaning basket and lowered into the bath where cavitation bubbles created by generator powered ultrasonic transducers implode on contact with the components to blast away paint residue.
This is much more efficient than using steel wool or brushes that can damage precision spray gun subassemblies.
Removing Oil-Based Paints from Spray Paint Nozzles
Oil-based paints and lacquers require specially formulated biodegradable ultrasonic cleaning solutions such as the semi-aqueous micro-emulsion CLN-SC75 available from our sister company iUltrasonic.
Used full strength in an ultrasonic cleaner this solution lifts paint residues from spray gun surfaces.
Removed residues can be filtered after a period of time and the solution reused until it is discarded following local regulations.
An alternate is NTB-100 used full strength or diluted up to 50% with water. As with CLN-SC75 this formulation can be filtered and reused.
Cleaning times depend on the condition of the components but in any instance should be less and definitely more thorough than any form of hand scrubbing.
At the end of the cleaning process rinse the components and allow them to dry. You should also establish a procedure to replace spent cleaning solutions (with disposal according to local regulations) and cleaning the solution tanks following manufacturers’ recommendations.
Proper Spray Gun Positioning with Ultrasonic Cleaner Accessories
Contaminants removed when sonic cleaning adhesive gun and spray paint nozzles rise to the surface, remain in solution or fall to the bottom of the tank. For that reason, nozzle orifices, tubing and similar components should be positioned vertically or near vertically to help gravity do its work.
On some occasions it may be necessary to reposition parts to help insure best cleaning results. In such cases do not reach into the bath. Instead remove the basket, reposition the parts and replace the basket in the bath. Caution: parts will be hot.
Check out the page on ultrasonic cleaner accessories found on the website of our sister company Elma Ultrasonics. You may find ideas in the lab and industry videos that can help you properly position parts in the ultrasonic bath.
More “Good Points” for Sonic Cleaning Adhesive and Spray Gun Components
The “magic” of ultrasonic cavitation explained in how ultrasonic cleaners work is that the imploding cavitation bubbles removing contaminants are so small they penetrate fine cracks, crevices and small openings unreachable by manual or mechanical scrubbing methods.
That’s one of the reasons (along with efficiency and thoroughness) that they are favored for cleaning carburetors and fuel injectors as well as finely machined components.
Need More Info on Cleaning Adhesive Gun and Spray Paint Nozzles?
Contact the ultrasonic cleaning experts at Tovatech for information on selecting ultrasonic cleaner models, cleaning solution formulations and procedures that keep your adhesive and paint spraying equipment operating at top efficiency.

