Ultrasonic Cleaning Options for 3D Printed Products
Ultrasonic cleaning is widely used to remove mold support and other surface contaminants from 3-D printed parts. Among the reasons for the popularity of ultrasonic cleaning is its thoroughness, speed and ability to access complex geometries unreachable via water sprays and potentially damaging manual cleaning with brushes.
This post briefly describes popular methods for manufacturing 3-D printed parts, then offers you useful options to employ ultrasonic cleaning to ensure a high degree of cleanliness in your finished products.
Two Popular Techniques Making 3-D Printed Parts
Companies and hobbyists employing 3D printing techniques employ a variety of plastics and resins such as ABS, PLA, polyamide (nylon), glass filled polyamide, stereolithography materials (epoxy resins), silver, titanium, steel, wax, photopolymers and polycarbonate.
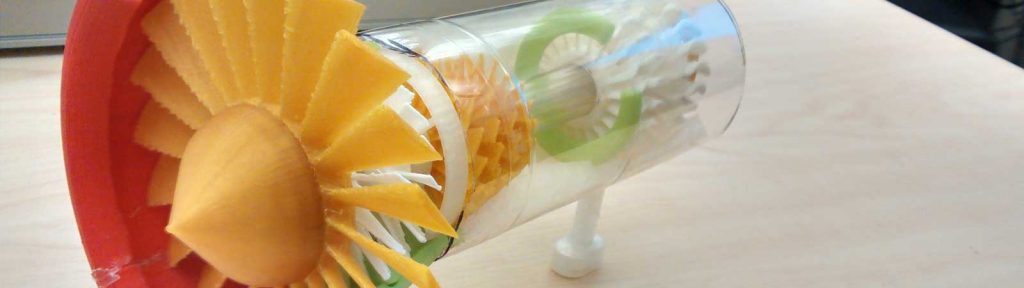
Among the earlier techniques still used combine two moldable thermoplastic formulations such as ABS for the part itself and PLA for removable mold supports to quickly produce highly complex configurations.
In this instance a key to the efficiency of the process is fast, safe removal of the PLA mold support without risking damage to the ABS part. An ultrasonic cleaner is proven far faster, safer and more effective than water sprays or manual scrubbing.
Recently techniques called SLA (stereolithography) and LFS (low force stereolithography) use lasers to build the part without the need of mold support. Uncured resin on the finished product requires removal best accomplished by ultrasonic cleaning.
A Two-Step Approach to Ultrasonic Cleaning 3-D Printed Parts
Two decisions must be made. The first is selecting an ultrasonic cleaning unit large enough to accommodate your 3-D printed parts in such a way that they are fully immersed. Some examples are provided later in this post.
The second point is the cleaning solution formulation.

Cleaning solution formulations for removing mold support and/or uncured resin may vary depending on the composition of the material being removed. One approach may involve a highly alkaline or caustic solution with a detergent serving as a wetting agent. Once the formulation is determined there is a fairly standardized procedure for removing mold support following the formulation directions.
Another instance, exemplified by wax, may call for flammable solvents with low flash points. Still others, such as LFS, may involve high flash point solvents or semi-aqueous solutions that contain solvents.
Options and Procedures for Cleaning 3-D Printed Parts
Here are options offered by Tovatech for setting up your cleaning system for 3-D printed parts.
1. Clean Small Parts with Flammable Solvent in Beakers
This may be the most practical solution for cleaning relatively small parts such as jewelry, dental implants and similar items using a volatile solvent such as isopropanol (IPA). It uses a conventional benchtop ultrasonic cleaner such as the 37 kHz Elmasonic E+, P or S unit with an accompanying beaker kit.
In this instance you can use tap water with a surfactant such as a few drops of dishwashing liquid in the ultrasonic cleaning tank. Before proceeding further remember to degas the solution by running the cleaner for about 10 minutes without a load.
Situate the ultrasonic cleaner in a well-ventilated area. Carefully place the parts in the beaker and add just enough solvent to ensure they are fully immersed. You can also use small, fine mesh screen baskets containing the parts and set into the beaker. In this case the small baskets must be such that you can cover the beaker loosely to minimize the vapor escaping during the cleaning process.
In either case, the bottom 1-2 inches of the beakers should be immersed in the water. The ultrasonic energy will penetrate the glass walls and cavitation action will occur in the solvent, thus cleaning your parts.
At the conclusion of the process carefully remove the parts which, when dry, will be residue free.
2. Clean Larger Parts with a Conventional Ultrasonic Cleaner
For cleaning larger parts using high flash point solvents (> 100°C) or semi-aqueous solutions you can use a benchtop ultrasonic cleaner with capacities to 7.5 gallons such as the 37 kHz Elmasonic P180H and P300H.
If the cleaning liquid is combustible, the tank must be fitted with a secondary container such as a polypropylene tub. The tank is partially filled with water and the tub is placed in contact with the water. This is a safety precaution in the unlikely event the tank develops a leak that would allow the solvent or solution to reach internal electronics.
Parts to be cleaned are placed in mesh baskets and lowered into the cleaning solution. This is followed by rinsing with clear water.
3. Use Specially Designed Explosion-Proof Ultrasonic Cleaners
For large scale operations the SOLXP explosion-proof ultrasonic cleaning systems in 2, 4, 6, 9 and 33 gallon tank capacities are available from Tovatech. These are designed to be used with low flash point volatile cleaning solvents such as IPA to clean 3D printed products.
The 40 kHz ultrasonic frequency SOLXP equipment is compliant with all Class I, Division 1 (CID1) code and zone requirements.* Different only in tank dimensions and capacities they can be fitted with a cooling jacket around the upper tank perimeter to capture solvent vapor and reduce odor.
Also available is an optional air driven pump and solvent purification system to reduce handling and improve product quality. This provides continuous solvent purification thereby extending its useful life.
The SOLXP explosion-proof ultrasonic cleaners have Intertek ETL Certification and are shipped with a remote generator panel to be located outside the CID1 envelope. Units are nitrogen inerted for additional fire protection.
A Note on Ultrasonic Cleaning and Heat
Energy that produces ultrasonic cavitation, the process that does the cleaning, generates heat which cause solvents and solutions to evaporate. This can be controlled by installing cooling coils in smaller benchtop units, by capping the solvent beakers or using a lid on the unit. As noted in option 3 above, the SOLXP units are equipped with a hinged lid and can be fitted with a cooling jacket.
In Conclusion
As suggested in this post several options are available for hobbyists and manufacturers to clean 3-D printed parts. Selecting an ultrasonic cleaner, a cleaning solvent or cleaning solution will be based on the size of your products and the specific materials used in the printing process.
Of particular importance during cleaning cycles is careful adherence to safety precautions when using solvents and aqueous solutions. We invite you to contact the scientists at Tovatech. We will be glad to discuss your operations and requirements, and to suggest an ultrasonic cleaning unit and cleaning solution best meeting your requirements.
—————–
*For details see these specifications on hazardous locations.
