Pipette Cleaning with an Ultrasonic Cleaner
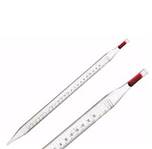
Calibrated glass tube pipettes can pose difficult cleaning challenges especially when used to dispense reagents that tend to cling to internal walls. The process can be extremely labor intensive and can call for multiple cleaning steps before the pipettes can be used with a different reagent. An added challenge is avoiding breakage when cleaning pipettes. Careful handling is called for, which can add to cleaning time. If your lab employs pipettes in multiple quantities you should consider using an ultrasonic cleaner to help speed the operation.
Widely used for cleaning medical and surgical instruments, ultrasonic cleaners use ultrasonic energy to remove contaminants prior to disinfecting or sterilizing. Instruments are placed in mesh baskets and immersed in an ultrasonic cleaning solution. Ultrasonic cleaners create billions of microscopic bubbles that implode on contact with instrument parts in a process called cavitation. The action blasts away the most tenacious organic substances. With simple modifications, the process can be applied to cleaning pipettes.
A Suggested Pipette Cleaning Procedure
Ultrasonic cavitation is so effective because it works on any surface exposed in the cleaning solution. This is why pipette positioning is a key consideration to ensure air is not trapped inside and that adhering reagents fall out of the pipette when dislodged by cavitation.
Here is a suggested procedure using a heater equipped Elmasonic Select 80 ultrasonic cleaner available from Tovatech. The unit has a capacity of 2.5 gallons of cleaning solution and inside tank dimensions of 19.9”L x 5.4”W x 5.9”D. It is equipped with a sweep mode to provide homogenous distribution of ultrasonic energy and a degas mode to quickly drive off cavitation inhibiting entrapped air. Other capacities and dimensions are available.
A good pipette cleaning solution concentrate is elma lab clean A20sf mild alkaline cleaner especially formulated for pipettes. When diluted to 0.5 to 2 percent with water it is a good choice for ultrasonic cleaning baths and rinsing units. It is tenside free so there are no residues after the cleaning operation.
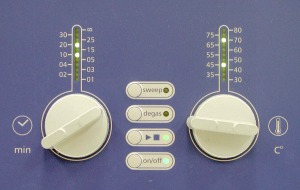
- Prepare the cleaning solution by adding water and the required concentrate to the tank fill line. Set the temperature to 70⁰C, activate the degas mode and turn the unit on. Operation will start when the set temperature is reached.
- In the meantime rinse the pipettes to the extent possible then place them on a slant in the open mesh-bottomed basket by leaning them on a test tube rack or similar support. Position the open end down to facilitate reagents falling more freely out of the tube. A fine mesh stainless steel screen on the bottom of the basket will keep small diameter pipettes from sliding through the bottom of the basket.
- Lower the basket into the solution. Set the timer for 10 minutes. Actual time will be determined by experience and the reagents involved. It may prove advantageous to raise and lower the basket periodically to assist in the process.
- At the end of the cleaning cycle remove and rinse the pipettes in DI or distilled water before drying, sterilizing or otherwise processing according to your GLP guidelines.
You’ll also need to establish standard operating procedures to drain and dispose of the cleaning solution as it becomes less effective, and for cleaning the tank according to the manufacturer’s instructions.

Pipette cleaning is easier with an ultrasonic cleaner
Ask the ultrasonic cleaning professionals at Tovatech for more information on how an ultrasonic cleaner can speed and improve your pipette cleaning procedures.

