Using OK-Sonic Bath Monitors for Medical Ultrasonic Cleaner Performance Validation
OK-Sonic Bath Monitors for medical ultrasonic cleaner performance validation strips provide added assurance that your ultrasonic cleaner is doing its job.
In its “Guideline for Disinfection and Sterilization in Healthcare Facilities” the CDC notes “Ultrasonic cleaning removes soil by cavitation and implosion in which waves of acoustic energy are propagated in aqueous solutions to disrupt the bonds that hold particulate matter to surfaces.”
Sub-par performance of a medical ultrasonic cleaner could lead to trouble. That’s because a number of factors can compromise the efficiency of these cleaners, leaving contaminants that might not be revealed by visual examination. This is especially relevant when medical instruments and labware have complex, difficult-to clean configurations.
How OK-Sonic Bath Monitors Measure Ultrasonic Cleaner Performance
OK-Sonic Bath Monitors are indicator strips that monitor the cleaning process in your medical ultrasonic cleaner. These include strength of ultrasonic cleaning cavitation, exposure time and temperature.
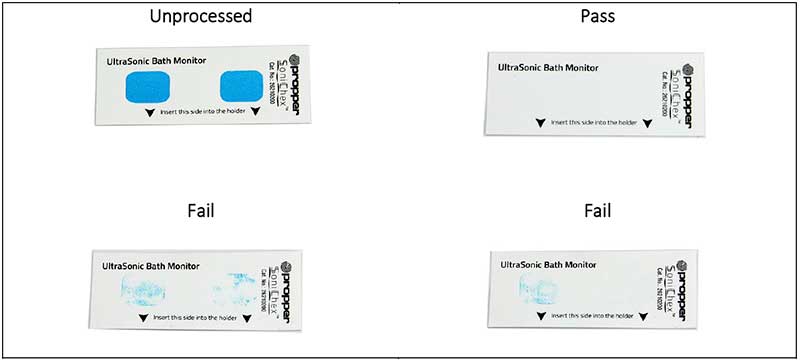
Each bath monitor consists of two blue protein mixture soil spots adhered to a plastic substrate. The spots do not contain any natural blood and have no risk of contaminating the cleaning chamber and its contents.
Instead, the stain mixture contains organic compounds normally present on medical instruments and devices after use with patients.
Both indicator soil spots have identical composition and are designed to be used with the monitor holder, which has one open and one covered side. The holder acts as a process challenge device that covers the indicator stain on one side of monitor strip while leaving the other stain spot fully exposed.
The covered stain simulates conditions that are challenging for cleaning. The open stain area simulates full exposure to cleaning cycle parameters inside the ultrasonic cleaner basket where the monitor is placed.
When placed in an your medical ultrasonic cleaner, the blue soil is slowly removed by cavitation in the cleaning bath, ideally using a medical instrument biodegradable formulation such as MedClean C7.
When your medical ultrasonic cleaner is operating properly soil spots are removed completely from the substrate when exposed to sufficient cleaning cycle parameters.
For more information and to order, download our OK-Sonic Ultrasonic Bath Monitor Data Sheet.

Additional Ultrasonic Cleaner Performance Check Tips
The medical ultrasonic cleaner performance validation discussed above focuses on medical instruments.
But consistent performance is desirable for all applications using an ultrasonic cleaner and especially critical in the pharmaceutical industry where cavitation action is used to emulsify, disperse, dissolve or mix difficult samples and degas HPLC samples.
The Elma S150 sonicator bath is an example used in these processes. Standard operating procedures should address consistency in the amount of solution in the ultrasonic cleaner tank, solution temperature, the number of samples treated in a sample prep cycle and the cycle time.
Establish Comparable Baseline Ultrasonic Cleaner Performance Parameters
Consistency is important when a single ultrasonic unit is used in these applications along with others such as API extraction from drug product for content uniformity testing.
If multiple ultrasonic cleaners are used for sample preparation, ideally they will be from the same manufacturer. More importantly they should perform equally during sample prep cycles.
If they do not, results will be inconsistent for parallel runs of the same sample types. Likewise, the performance of individual ultrasonic units may change over time and also contribute to inconsistent results.
How to Set Ultrasonic Cleaner Performance Benchmarks
Think of this as akin to a service record for your new car or your medical records kept on file by your family physician.
The Foil Test

A widely accepted means to establish an ultrasonic cleaner performance benchmark is called the “foil test.” It is simple, very effective, and should be initiated as soon as you place your new unit in service. This provides you with a baseline that allows you to monitor performance on an ongoing basis.
Conduct this test with freshly prepared and degassed cleaning solution formulations that you regularly use in your operations, and at the solution temperatures you normally use.
- Cut 3 strips of regular (not heavy-duty) household aluminum foil
- Suspend them in the cleaning solution by hanging them over a wire – one in the center and the others at each end, but not touching the tank walls or bottom. This placement lets you test the efficacy of transducers bonded to the cleaning tank.
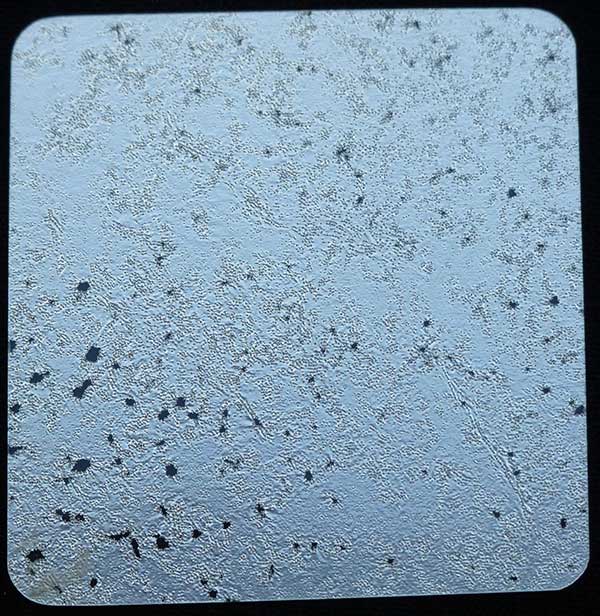
- Turn on the ultrasound. In a few minutes all foil sheets should display evidence of significant pitting, dents and holes, indicating that the cleaner is working properly.
- Retain the strips in a plastic sleeve marked with the date and the ultrasonic cleaner number to compare results with future tests that you should schedule on a regular basis.
The Pencil Test
This simple test can be performed with a frosted glass and a No. 2 pencil. Draw an X on the frosted glass connecting the corners. Immerse the glass in the tank and activate the ultrasound. Record the time it takes for the X to disappear. This provides the benchmark for future tests.
Questions? Want to Learn More About Performance Testing?
Call or chat with the ultrasonic experts at Tovatech for additional information on performance testing procedures.
